介绍
在RK3588触摸屏上使用QML开发手持设备应用
CMake
QML工程需要包含C、C++、QML、QRC、UI等文件,参考配置如下
1
2
3
4
5
6
7
8
9
10
11
12
13
14
15
16
17
18
19
20
21
22
23
24
25
26
27
28
29
30
31
32
33
34
35
36
37
38
39
40
41
| cmake_minimum_required(VERSION 3.5)
project(demo LANGUAGES CXX)
set(CMAKE_INCLUDE_CURRENT_DIR ON)
set(CMAKE_AUTOUIC ON)
set(CMAKE_AUTOMOC ON)
set(CMAKE_AUTORCC ON)
set(CMAKE_CXX_STANDARD 11)
set(CMAKE_CXX_STANDARD_REQUIRED ON)
find_package(Qt5 COMPONENTS Core Quick REQUIRED)
include_directories(${CMAKE_SOURCE_DIR})
set(SRC_DIR ${CMAKE_CURRENT_SOURCE_DIR})
file(GLOB_RECURSE SRC
"${SRC_DIR}/*.cpp"
"${SRC_DIR}/*.cxx"
"${SRC_DIR}/*.cc"
"${SRC_DIR}/*.c"
)
file(GLOB_RECURSE HEADERS
"${SRC_DIR}/*.h"
"${SRC_DIR}/*.hpp"
"${SRC_DIR}/*.hxx"
)
file(GLOB_RECURSE RES
"${SRC_DIR}/*.ui"
"${SRC_DIR}/*.qrc"
)
add_executable(${PROJECT_NAME} ${SRC} ${HEADERS} ${RES})
target_compile_definitions(${PROJECT_NAME} PRIVATE $<$<OR:$<CONFIG:Debug>,$<CONFIG:RelWithDebInfo>>:QT_QML_DEBUG>)
target_link_libraries(${PROJECT_NAME} PRIVATE Qt5::Core Qt5::Quick)
|
代码
main.cpp,与普通的Qt5应用不同的是:运行的主体变成了main.QML,cpp文件只是提供了一个应用入口,通常的做法也是将QML放到qrc里边来提高运行效率
1
2
3
4
5
6
7
8
9
10
11
12
13
14
15
16
17
18
19
20
21
22
23
24
25
26
27
28
29
30
31
32
33
34
35
36
37
38
39
40
41
42
43
44
45
46
47
48
49
| #include <QGuiApplication>
#include <QQmlApplicationEngine>
#include <QQuickWindow>
#include <QQmlContext>
class MainViewObject : public QObject {
Q_OBJECT
Q_PROPERTY(QString text READ getText WRITE setText NOTIFY textChanged)
public:
explicit MainViewObject(QObject *parent = nullptr) : QObject(parent) {
}
~MainViewObject() {
}
protected:
QString getText() {
return m_text;
}
void setText(const QString &text) {
m_text = text;
}
signals:
void textChanged();
private:
QString m_text = "hello world";
};
int main(int argc, char *argv[]) {
QGuiApplication app(argc, argv);
QQmlApplicationEngine engine;
MainViewObject main;
engine.rootContext()->setContextProperty("mainObject", &main);
engine.load(QUrl(QStringLiteral("qrc:/QML/MainView.QML")));
QObject *rootObject = engine.rootObjects().first();
QQuickWindow *window = qobject_cast<QQuickWindow*>(rootObject);
if (window) {
window->show();
}
return app.exec();
}
#include "main.moc"
|
MainView.qml,类js脚本文件,可以看到跟C++编译定义式不一样的是:QML这里很多对象或控件(Window、Label、Image、Rectangle、Row、Timer)都变成了声明式,根据对象的属性直接配置就好,对象之间的联动可以通过信号和槽来实现
1
2
3
4
5
6
7
8
9
10
11
12
13
14
15
16
17
18
19
20
21
22
23
24
25
26
| import QtQuick 2.12
import QtQuick.Controls 2.12
import QtQuick.Window 2.12
Window {
id: mainWindow
width: 1280
height: 720
visible: true
flags: Qt.Window | Qt.FramelessWindowHint
color: "white"
Label {
id: textLabel
font {
pixelSize: 36
}
text: mainObject.text
color: "black"
anchors.centerIn: parent
width: parent.width * 0.8
horizontalAlignment: Text.AlignHCenter
verticalAlignment: Text.AlignVCenter
}
}
|
对象交互
属性访问
C++ -> QML:通过context property传递或者qmlRegisterType方式
第一种方式,C++端注册mainObject对象,可以在QML直接使用C++对象属性
1
2
3
4
| QQmlApplicationEngine engine;
MainViewObject main;
engine.rootContext()->setContextProperty("mainObject", &main);
engine.load(QUrl(QStringLiteral("qrc:/QML/MainView.QML")));
|
比如想要在Label对象里边使用mainObject对象的属性,都不需要有显式的import声明
1
2
3
| Label {
text: mainObject.text
}
|
另一种方式是,注册QML对象的方式,这种方式可以提供成员函数调用
1
2
3
4
5
6
7
8
9
10
11
12
13
14
15
16
17
18
19
20
| class QmlObject : public QObject {
Q_OBJECT
public:
explicit QmlObject(QObject *parent = nullptr) : QObject(parent) {
}
~QmlObject() {
}
Q_INVOKABLE QString getName() {
return m_text;
}
private:
QString m_text = "hello world";
};
qmlRegisterType<QmlObject>("QmlObject", 1, 0, "QmlObject");
|
QML对象可以通过上面的对象名称访问成员函数或者属性,不过跟前一种不同的是,这里需要显式调用import
1
2
3
4
5
6
7
8
9
10
11
12
13
14
15
| import QmlObject 1.0
Window {
id: mainWindow
width: 1280
height: 720
visible: true
flags: Qt.Window | Qt.FramelessWindowHint
color: "white"
property int demo: 1314
Component.onCompleted: {
console.log("name : ", QmlObject.getName())
}
}
|
QML -> C++
可以在QML侧定义property或者指定对象的objectName
1
2
3
4
5
6
7
8
9
10
11
12
13
| import QtQuick 2.12
import QtQuick.Controls 2.12
import QtQuick.Window 2.12
Window {
property int demo: 1314
Label {
id: customLabel
text: mainObject.text
objectName: "myLabel"
}
}
|
C++侧访问QML对象属性和子对象
1
2
3
4
5
| QObject *rootObject = engine.rootObjects().first();
qDebug() << "demo : " << rootObject->property("demo").toInt();
auto label = rootObject->findChild<QObject *>("myLabel");
label->setProperty("text", "nice to meet you!");
|
信号和槽
C++侧定义updateText信号
1
2
3
4
5
6
7
8
9
10
11
12
13
14
15
16
17
18
19
20
21
22
23
24
25
26
27
28
29
30
31
32
|
class MainViewObject : public QObject {
Q_OBJECT
Q_PROPERTY(QString text READ getText WRITE setText NOTIFY textChanged)
public:
explicit MainViewObject(QObject *parent = nullptr) : QObject(parent) {
}
~MainViewObject() {
}
protected:
QString getText() {
return m_text;
}
void setText(const QString &text) {
m_text = text;
}
signals:
void textChanged();
void updateText(const QString &text);
private:
QString m_text = "hello world";
};
emit main.updateText("hywing");
|
QML侧捕获updateText信号,需要在Connections里边定义槽函数
1
2
3
4
5
6
7
8
9
10
11
12
13
14
15
16
17
18
19
| Label {
id: textLabel
objectName: "myLabel"
font {
pixelSize: 36
}
Connections {
target: mainObject
function onUpdateText(text) {
textLabel.text = text;
console.log(text)
}
}
Component.onCompleted: {
console.log("this is myLabel")
}
}
|
也可以这样给一个对象绑定一个匿名槽函数,textChanged这个信号必须在MainViewObject里边提供
1
2
3
4
5
6
| Component.onCompleted: {
console.log("this is myLabel")
mainObject.textChanged.connect( function() {
console.log("signal emitted!")
})
}
|
调试
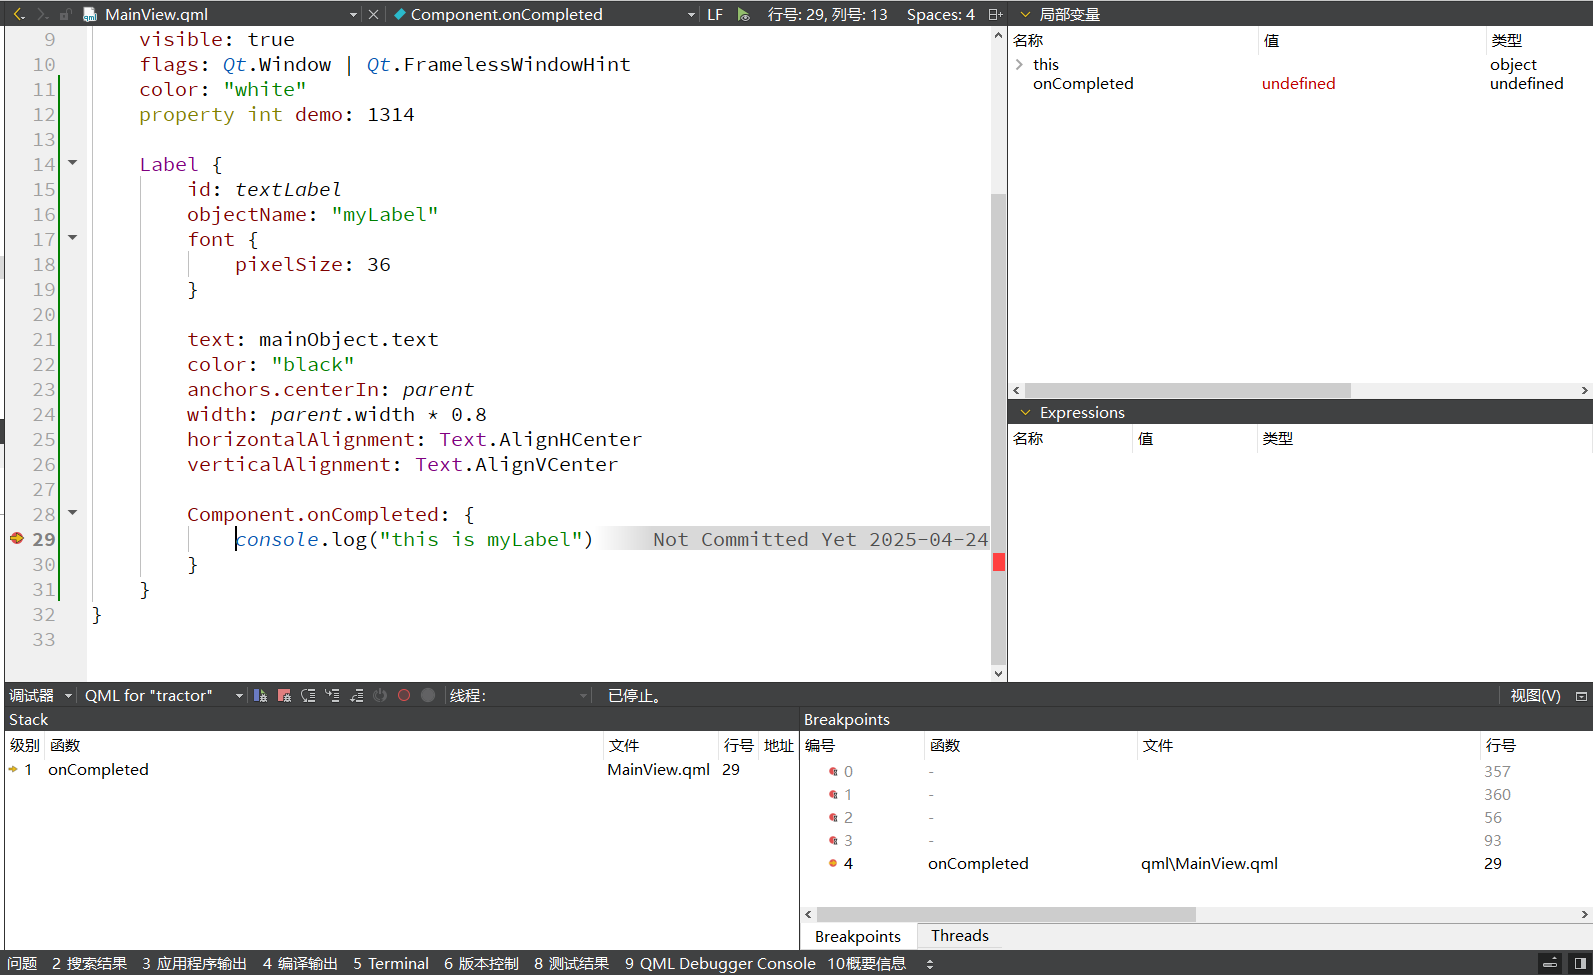
QML的远程调试需要绑定端口号来使用,实际开发往往都是用console打log,就像web html那样;因此我觉得,它做界面就够了,不要把复杂的业务逻辑打包在脚本文件里边

总结
- QML库的水太深,容易奔溃(有时候是编译不报错,运行时报错,有些版本库命名也没有统一),做QML开发需要关注不同Qt5版本的兼容性问题,目前用2.12在
Qt5.12.9和Qt5.15.8运行都没有问题
- 封装继承不好实现,因为如果是简单的UI可以用QML尝试,复杂要继承的话还是走C++吧
- 业务逻辑也不推荐放QML端,一个脚本解析引擎的效率要打上问号
